Afrika Korps
How to play: starting, the controls, the turn, movement, combat, and how the campaign is won and lost.
Beginning
Open the game and choose one army for a solo campaign, or choose Two Commanders to play both armies locally. Then select a campaign number; solo games also use the machine commander setting.
- Cadet is careless with its supply and does not give every formation an order every turn. Staff officer is the normal setting. Veteran is the most careful.
- The campaign number decides the whole campaign. The same number always deals the same one, so a campaign can be handed to somebody else and played again exactly. Press New number for a fresh one.
- Take the Panzerarmee and you are attacking eastward from Agheila. Take the Eighth Army and you are holding the road to Alexandria.
- Two Commanders gives each army to a local player. At the end of every command turn, an opaque handoff screen hides the board until the next commander is ready.
If a saved campaign exists, Resume the saved campaign picks it up where it was left. Progress is saved automatically after every action.
Controls
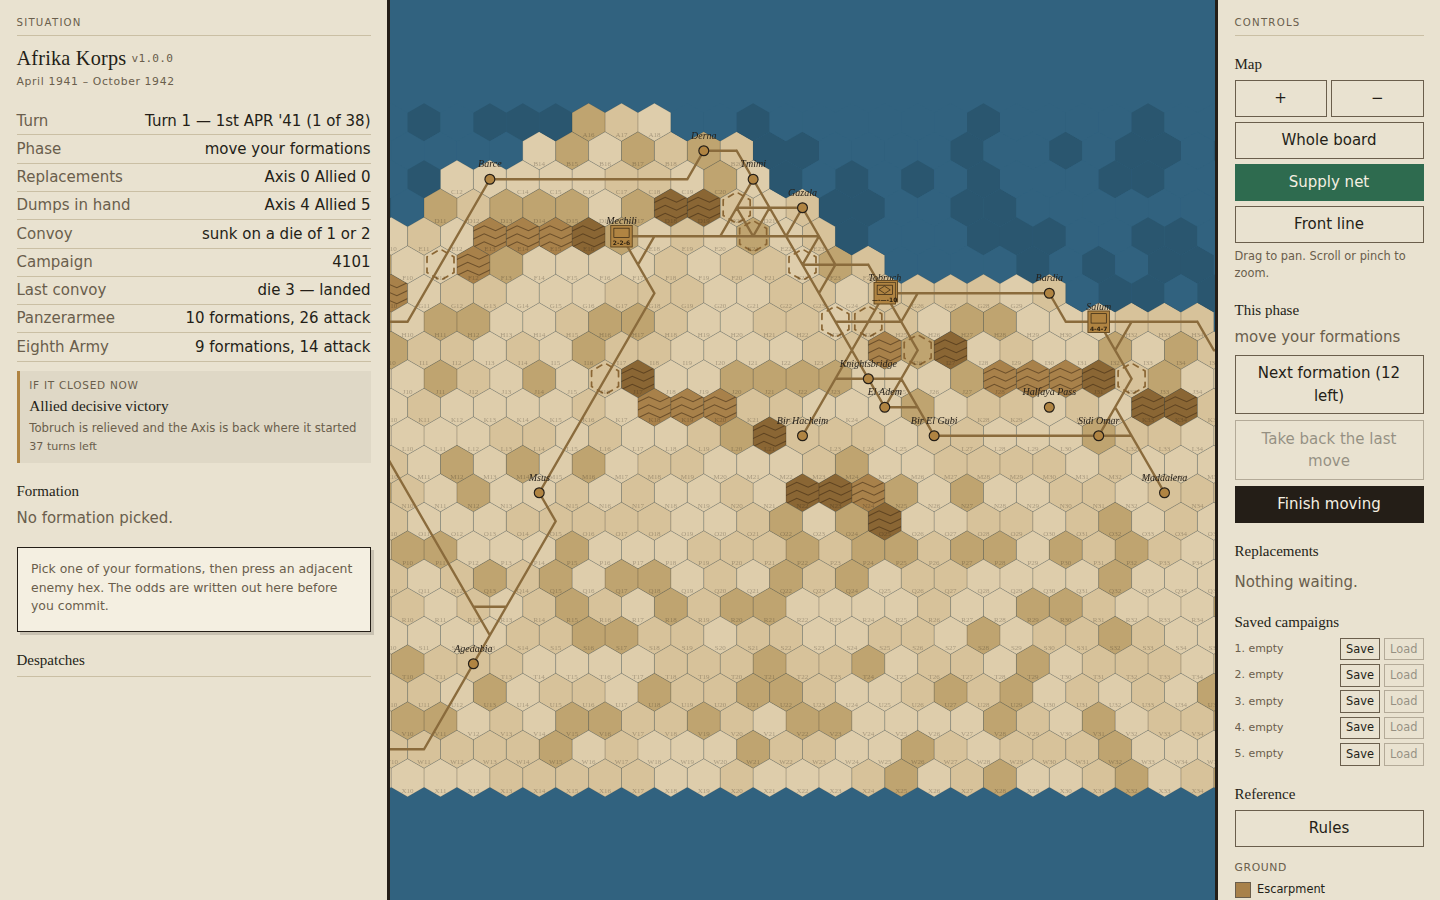
Drag the map to pan it. Scroll or pinch to zoom, or use the buttons at the top of the control column. Whole board fits everything in one view; Front line jumps to where the armies are in contact. High contrast, or C, switches the interface and battlefield to stronger colours and heavier focus outlines. The choice is remembered on this device.
Hover any hex for a readout of the ground, what it does to movement and defence, and every formation standing there with its factors.
| Key | Does |
|---|---|
| ← → ↑ ↓ or W A S D | Pan the map |
| + − | Zoom in and out |
| F | Fit the whole board |
| N | Next formation still to move |
| U | Take back the last move |
| ← → ↑ ↓ with a formation picked up | Move the cursor over the board |
| Enter | Move to the hex under the cursor, or attack it |
| Esc | Put the picked formation down |
| Q | Quick save into slot 1 |
| 1 – 5 | Load that saved campaign |
| ? | The rules sheet |
Playing without a mouse
The whole game can be played from the keyboard. N picks up the next formation that still has orders to give. With one picked up, the arrow keys move a cursor over the board and Enter acts on whatever it is over — moves there in the movement step, aims an attack in the combat step. Esc puts the formation down and gives the arrows back to panning. W A S D pan either way.
Every hex the cursor lands on is announced: the ground and what it does, what is standing there, and whether it is reachable or can be attacked. The board carries a running description of the turn and phase for screen readers.
The turn
Thirty-eight turns, two to the month, from April 1941 to October 1942. Each side takes its turn in four steps:
- Supply. A dump arrives at your home base, if one is in hand and the convoy gets through. Every formation is then checked against the supply net.
- Reinforcements and replacements. Formations scheduled for this turn appear. From early March 1942 you also earn replacement points and may spend them on formations in the pool.
- Movement. Give orders to as many formations as you wish.
- Combat. Attack as often as the board allows; each formation attacks once.
Press Finish moving to go from movement to combat, and End the turn to hand over.
Supply
This is the spine of the game and the thing that most often decides it.
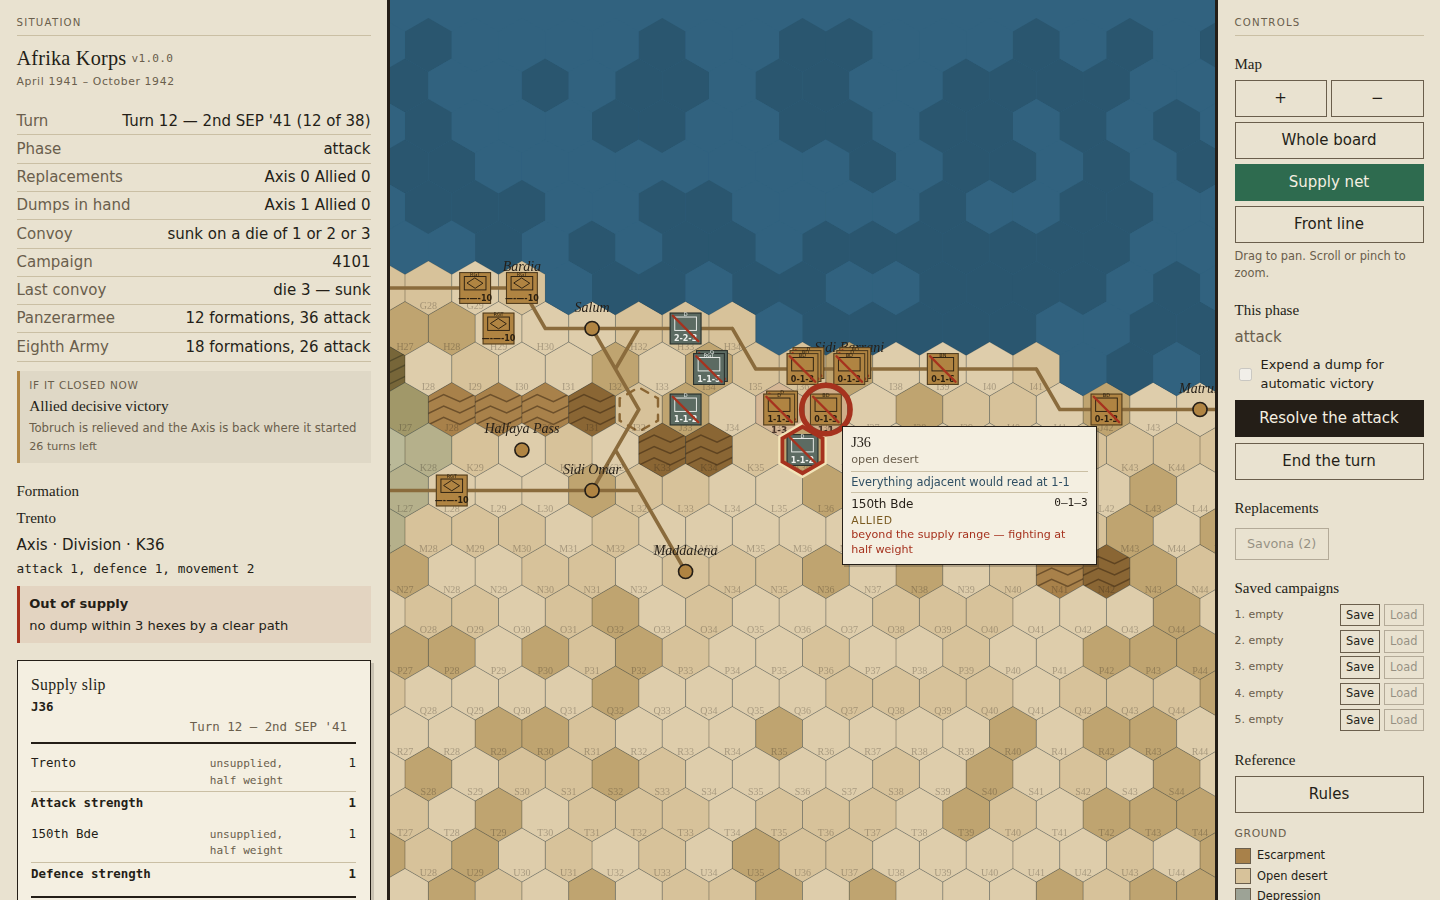
Every fighting formation must trace a clear path to a supply dump — three hexes for the Axis, four for the Allies. Beyond that range it fights at half weight, attack and defence both, for as long as it stays there. Enemy formations and their zones of control cut the path.
A formation with no path home at all is isolated, which is a different and far worse thing: a second consecutive turn isolated and it is struck off. That happens at the end of the combat step, so an isolated formation still gets to fight, and an attack that reopens its road still saves it.
Dumps are ordinary counters and must be walked forward with the army. Axis dumps come by sea and can be sunk: on a 1 or 2 early in the campaign, on anything up to a 3 through the second half of 1941, and on a 1 only from December 1941.
The one thing to learn first. An army that outruns its dumps loses half its strength and then starts dying. Move the dumps forward before you move the army, not after.
Pick any formation and the panel shows where its supply comes from and by which hexes. The Supply net button tints everything currently in supply.
Movement
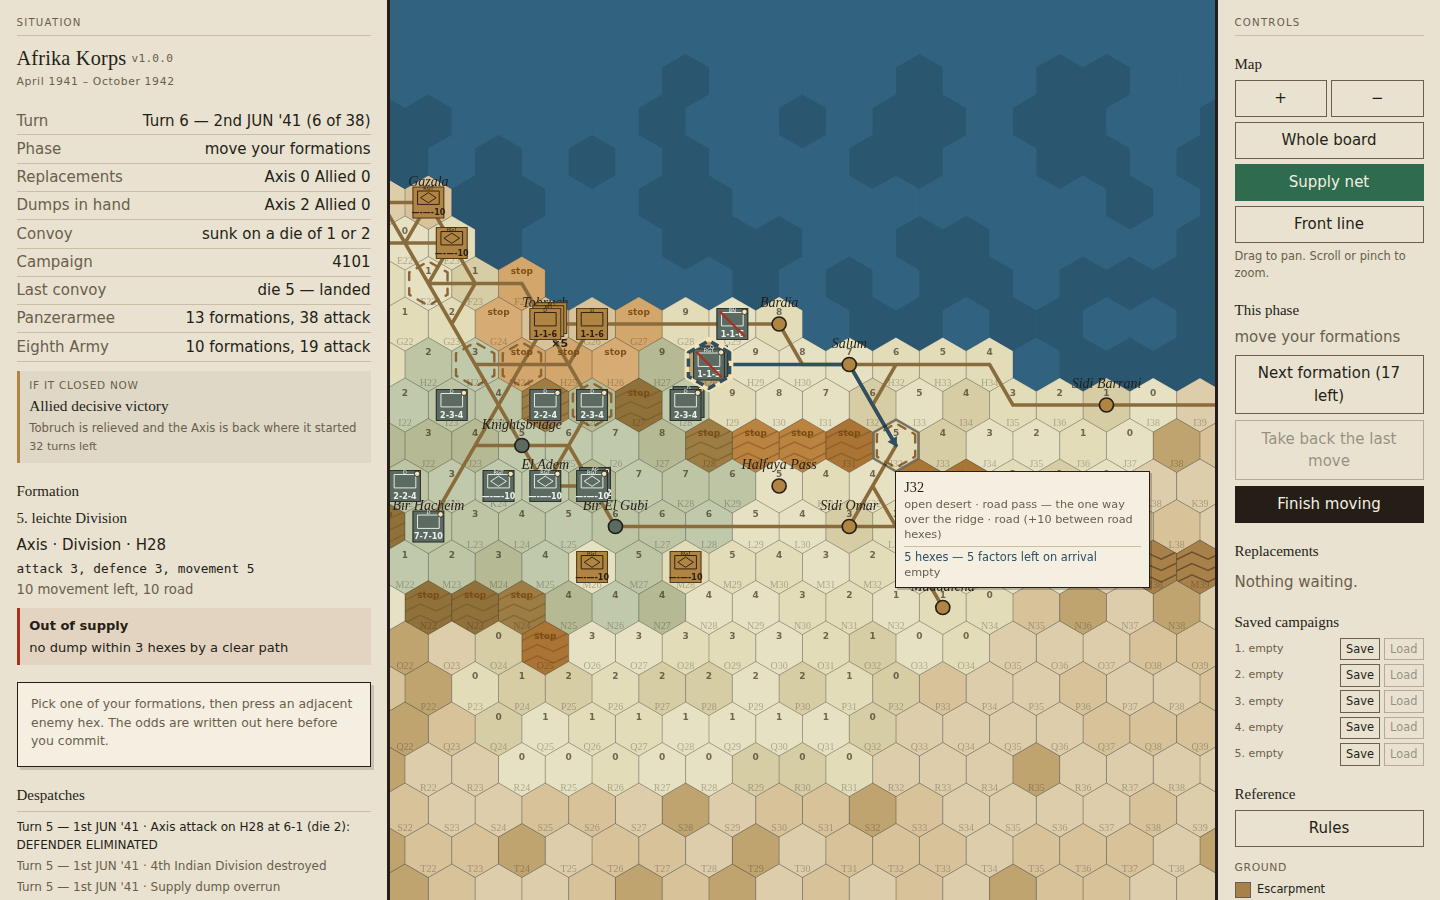
Press a formation to pick it up. Every hex it can reach is tinted, in two colours:
- Pale green — you can move on from here. The number is what you would have left on arrival.
- Orange, marked stop — entering ends the move. Escarpment ground does this, and so does an enemy zone of control.
Hover a reachable hex and the route is drawn with an arrow. Press it to move there. Next formation walks you through whatever still has orders to give; anything still to move carries a pip on its corner. Take back the last move undoes it.
Other rules worth knowing: a formation may not step straight from one enemy zone of control into another; the coastal road is worth ten extra movement factors, but only between two road hexes; and the road pass at Halfaya is the one place the Sollum escarpment can be crossed without stopping.
Combat
In the combat step every enemy hex you can reach is tinted and carries the odds it would read at if everything adjacent attacked together. Press your own hexes to commit them, then press the enemy hex to aim.
The supply slip then writes the attack out before you commit it: what each formation brings, whether supply has already halved it, what the defenders bring, every doubling itemised, the two totals, and the odds column they land in. After the die it stamps the face and the verdict on the same sheet.
- Odds are cut down to the printed column, never up. The defender keeps the remainder.
- A fortified city doubles the defence. So does escarpment ground. The two do not stack.
- Worse than 1-7 is an automatic defeat, and does not count as an attack.
- 7-1 or better takes the hex without a die, but only if you expend a dump within five hexes. Against a surrounded hex, 5-1 is enough. Without the dump the attack reads on the column below.
The full combat results table, the Axis convoy table and the terrain effects are all in the Rules sheet in the control column, drawn from the same data the game resolves against. When an attack is set up, the column it will read on is marked, and so is the convoy band the campaign is currently in.
Results are attacker eliminated, attacker retreats, exchange, defender retreats, or defender eliminated. Retreats are two hexes, and a formation that cannot fall back is destroyed where it stands.
Winning
Two ways to end it early:
- Occupy Alexandria (J62) and the Axis wins at once.
- Occupy Agheila (W3), or destroy the whole Panzerarmee, and the Allies win at once.
Otherwise the front line at the close of turn 38 decides it:
| Axis holds | Result |
|---|---|
| El Alamein | Axis marginal victory |
| Matruh | Drawn |
| Tobruch | Allied marginal victory |
| None of these | Allied decisive victory |
The left column carries a running if it closed now reading, so you can always see what the position is currently worth and how many turns are left.
Losing
You lose by the mirror of the above: as the Axis, by being pushed back off Tobruch by the close, or by losing Agheila or your army outright. As the Allies, by letting the Axis reach Alexandria, or by leaving it standing at El Alamein when the campaign closes.
Most losses do not come from a bad attack. They come from an army that has outrun its supply and is fighting at half strength against one that has not.
Saving and restarting
The campaign is saved automatically after every action, in your browser, and is offered on the opening sheet as Resume the saved campaign. That autosave is one deep and is overwritten constantly.
For anything you want to keep there are five numbered slots, in the control column under Saved campaigns. Each shows the turn, the army and the campaign number it holds. Q quick-saves into slot 1 and 1–5 load. Saved campaigns also appear on the opening sheet, so you can pick one up without starting a new game first.
Hot-seat mode is preserved in autosaves, numbered slots, and exported campaign files. Loading one returns to the handoff screen for the army whose turn is active.
The Casualty ledger in the Situation column records every combat formation and headquarters removed from play. It keeps separate totals for both armies, counts printed attack and defence factors lost, and retains the cause and turn of each loss. The complete record travels with autosaves, numbered slots, exported campaign files, and campaign reports.
Campaign History, available under Reference or with H, plots the attack strength of both armies and records formations, cumulative losses, and the Axis line of advance for every completed turn.
The Operations Plan adds your own map annotations. Choose Attack, Defend, Supply, Observation, or Erase in the control column and then select map hexes. Choose Note and select an existing marker to attach up to 160 characters of orders. A gold dot identifies a marker with a note. Marks and notes appear during map inspection and in campaign reports. The live ledger beneath the planning tools lists every order from west to east. Select a row to locate its hex, or use its Note and delete controls directly. Press P to pause or resume planning without changing the selected tool.
A Command Check appears before you finish movement while formations still have movement remaining, or end combat while worthwhile legal targets remain. It lists up to six overlooked formations or targets. Return to the board to act, or choose the explicit override to continue.
A save carries the format it was written in. One written by a different version of the game is refused with a message rather than half-loaded into a campaign that then behaves strangely.
When a campaign ends you are offered Start a new campaign and Play this one again — the second deals the same campaign number, so you can try the other line from the same position.